Announcement

Collapse
No announcement yet.

1964 Dorsett Catalina Transom Re-build (part 3)

Collapse
X
  • Filter
  • Time
  • Show
Clear All
new posts

  • 1964 Dorsett Catalina Transom Re-build (part 3)


    I've completed another repair trip to replace the transom on my 1964 Dorsett Catalina. I got a couple of major things done, but once again I didn't get as much done as I had hoped for. I had a couple of set backs, and I made a few beginner mistakes. I lost a couple of days due to the weather, etc., but I'm still enthusiastic and determined. At the time of this posting I have been home for about a month. I am starting to realized the amount of work and cost involved in this restoration project. As far as not getting as much accomplished as I wanted to....................it doesn't deter me, it doesn't disappoint me, it just means it's going to take a little longer than I expected. I kind of enjoy the challenge. I am looking forward to my next trip, and planning it as soon as possible. On this trip I wanted to at least get the first piece of transom plywood installed, but a list of things had to be done first. I keep the boat in storage near Ute Lake State Park, at Logan NM (near Tucumcari). It's about 300 miles from where I live in Northern NM. I've scheduled 10 days for this trip, that includes one day to travel there; and one day to travel home. So........., that leaves 8 days. I lose another day of work unpacking, getting the boat out of the storage unit, unloading all the tools, setting up my work area and housing. Then I lose another day putting everything back up, packing tools and cleaning the house before I leave. So.........., that leaves about 5 days or so to work on the boat. I say, "go for it"!


    I had some choices to make once I got everything ready to go to work. I need to decide on how I was going to get access to the transom. I had 3 choices:


    1. Uncap the top and remove it.

    2. Cut the topcap on each side, just in front of the splashwell. Then remove the splashwell.

    3. Uncap the top about 5/8 of the way on each side from the rear of the boat forward. Then jack up the splashwell high enough to gain access to the transom.

    I decided to try choice #3 first. That way if I needed to camp at the State Park, I could still stay in the cabin of the boat (I'm staying at a friend's cabin, but he closes and winterizes it during the winter).

    So, that's where I started...........

    I had already uncapped it about 1/2 way on my last trip to remove the old plywood. So now I decided to uncap it about another two feet on each side. That means I needed to remove the stainless steel wire staples that hold the topcap to the hull. But before I could do that I needed to drill small pilot holes next to the staples, to use to re-align the topcap when it was time to replace it. Drilling the holes and removing the staples took quite awhile. The wire staples are a lot tougher than you might imagine. I had to use a hammer and a small chisel to unbend the bottom part of the staple, before I could pull them through to remove them. I also had to un-bolt the rubrail a little farther on each side. This is where I hit one of the set backs I mentioned in the first paragraph. I got the port side un-bolted, although I had to wrestle with a couple of rusted bolts. On the starboard side I only had two bolts to go when I came to one that wouldn't let go. On the outside portion of the rubrail under the rubber insert, it had a flathead standard screw. On the inside portion of the rubrail, right up against the cabin bulkhead; was a 3/8'' nut. I tried every trick in the book. I placed a box end wrench on it and taped it to the wall against the bulkhead, climbed out of the boat and tried to unscrew it with a large screwdriver. Either the wrench would slip off or flip off when I applied pressure, or the screwdriver would pop out of the slotted screw head (I was about to ruin the screwhead). Over and over, in and out of the boat, again and again. Then, I used vice grips instead of the wrench, same story. Then I thought OK......... I'll heat it up. I made a heat shield out of aluminum foil and an aluminum pie plate. I used a small adjustable propane torch. But the bolt was just to close to the wall, and I was afraid I would damage it. So I stopped. Then, I drove into Logan,NM, to the auto parts store (it's also a hardware, plumbing and feed store) and ordered an impact screwdriver. The kind you hit with a hammer to loosen the screw, and with the impact it wouldn't slip out of the slot. They said they could have it there by eight o'clock in the morning. OK.....I'll pick it up in the morning.


    I picked up the impact driver the next morning and went straight to work on the stuck bolt. I made sure the impact driver was turning in the right direction to loosen, put it on the screw and gave it a whack. Nothing moved...........gave it another whack, and another, nothing moved??? I tried it on a screw on my pickup, it loosened it. Tried it again on the boat, nothing. I finally decided that there was to much "give" in the fiberglass of the boat for the "impact action" to work as it should. What next.....??? I'll try to drill the screw out. The screw was stainless steel, therefore very hard. I broke two 1/8" drill bits in a row. I am doing everything I can not to damage the boat any further. I had this boat looking really good before I damaged the transom. I finally gave in and did something I didn't want to do.............I drilled through the rubrail on both sides of the screw, and "grabbed" it with a pair of needle nosed vise-grips. Then I went inside and finally loosened the nut, and removed the screw. I brought the screw and nut home with me and I keep it on my desk, to remind me sometimes you have to persevere.


    I had wasted a lot of time removing the screw and nut. The weather was supposed to start turning bad tomorrow. I had to keep working if I wanted to accomplish everything I had on my to-do list. Now that I had a portion of the boat topcap loosened, I could attempt to jack up the splashwell for access to the transom. I gathered the materials, and built an elevated pad for the floor jack to rest on. I used a 2''x4'' under the splashwell for the jack to lift against. Once everything was in place, I started jacking the splashwell up. Everything went pretty well, I proceeded s-l-o-w-l-y. I got out of the boat and checked for excess stress areas, every 2 or 3 inches of upward lift. Everything looked good, after lifting the splashwell about 10"; I got out and checked for stress areas again. I could still actually lift the splashwell by hand, no problem. I only needed to lift it about 14" or so, four more inches to go. I jacked the last 4 inches very slowly. When it was high enough, I let out a deep breath and smiled. I didn't move for a while, I just let everything rest in place, and become accustomed to its new spot. This is when I hit the second set back I mentioned in the first paragraph. I was placing supports under both sides to hold it in place, so I could remove the jack. CRACK!!! ........Huh??? What??? I got out and looked around and discovered a crack in the fiberglass on the starboard gunwale, where it turns upward to form the cabin.
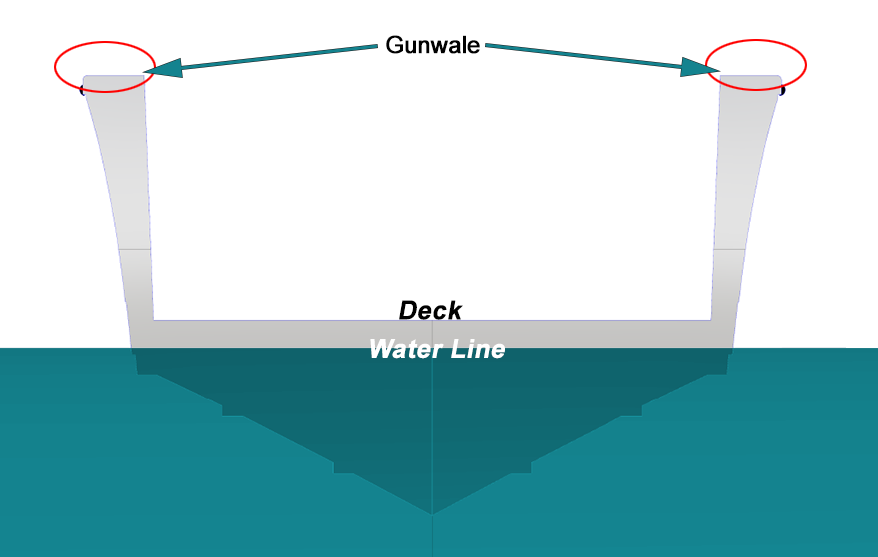
    gun·wale
    /gənl/
    noun
    noun: gunwale; plural noun: gunwales; noun: gunnel; plural noun: gunnels
    • the upper edge of the side of a boat or ship.


    I went back in the boat and removed the supports, and lowered the jack to relieve the stress on the gunwale. I started looking for the reason the gunwale cracked instead of lifting like it should have. It didn't take long to figure it out. I had forgot to remove the screws that go through the roof crosspiece behind the cabin bulkhead, that hold the topcap in place. A mistake only a beginner would make, i just hadn't thought of it. (aahhhhhhh!!!)


    Well,..........what now, what to do next??? I sat down and thought about it for awhile. I could repair the crack, no big deal. I decided to make a temporary brace 5' long, out of a 1''x4''. Then, place the brace on the outside of the gunwale, with the crack in the middle area of the brace. Then, jack up the topcap again and go on from there. But first, I needed to re-attach the topcap to the hull so that it would be straight when I attached the brace. Thankfully, I had drilled 1/8'' pilot holes in the topcap and hull. I used 1/8''x3/8'' thread rolling screws (used to fasten plastics) to join the topcap and the hull. When the time comes, I will use these same screws and 3M 5200 adhesive; to permanently bond the topcap and hull. I got the topcap and hull put together just before dark. The weather was supposed to turn bad tomorrow, it was already getting cloudy and windy. I called it a day.


    The next morning was windy, cloudy and cold, the predicted high temperature for the day was 34 degrees. I already had a plan in mind of what I was going to do today. I had purchased a new Craftsman (job site) Table Saw. I bought it online, specifically for this project. I had it shipped to the Post Office in Logan, NM, via General delivery. It came in a large box and it saved me having to haul it all the way there. So, the plan for today was to go to the Post Office and pick it up, bring it home and assemble it. And, one final chore, I usually always bring my dog "Sugar" with me for company, she's always ready for an adventure. She loves to go on the boat, and I consider her part of my crew with the rank of "swabbie". Anyway, she was getting restless so I needed to take her for a run today too. Late in the day it started to rain. So, that's how I spent this cold, wet day.


    It drizzled rain most of the night, but by ten o'clock the next morning it was mostly sunny. The high for today was supposed to be in the upper 40's. The wind had stopped blowing as hard, but it was still breezy. I went to work and placed the brace on the gunwale. I took out all the thread rolling screws and jacked up the topcap, this time without incident. As it was already about 1:30 in the afternoon, I wanted to start work on the transom pattern right away. Instead, I noticed that material from the old fillets and fiberglass residue was still attached in the corners and along the edges where the old plywood used to be attached. It would have to be removed before I could go any further. I was anxious to start cleaning the old fillet material. I had very little experience in fiberglass grinding and sanding at this point, and I wanted to see what it was like. I started with the oscillating multi-tool (OMT) with a serrated cutting blade and made some progress. I couldn't believe the amount of dust it produced. I had to clean both sides of the transom, the bottom was already clean. After a while I switched from the serrated blade to a rasp attachment on the OMT. It produced twice the amount of dust. For awhile, I was working outside in a breeze, and the amount of dust was very noticeable. Then, the rest of the work was sanding inside the boat, with a lot of airborne dust. I decided to be smart, and use my respirator. I had used the respirator on my last trip but only for a very short time. This was going to be its first real test. It took about three hours to clean the edges and a few other spots. How did the respirator do??? It was not as comfortable as I had hoped for. I wear glasses (I'm old) and the respirator is a full facemask type, it pressed my glasses against the bridge of my nose. It became uncomfortable very quickly. The respirator has filtered, constant flow, fresh air from a small rechargeable air-pump that you wear on your belt. The air flow was pretty weak until I removed the rubber diaphragm in the one way, fresh air feed valve. With forced air I don't believe you need the one way valve, after removing the diaphragm the air supply was adequate. Helmar had sent me the link to buy one, but I was cheap and bought a similar cheap knock off brand on Ebay. I should have spent the money and bought the one Helmar recommended. After doing about 3 hrs of sanding fiberglass, I can understand why people dread it. I was fairly covered with white fiberglass dust, my hair, my arms, my clothing, pretty much all over. Even with the respirator being uncomfortable, I'm glad I used it. It was late afternoon by the time I finished sanding and cleaning the edges. Working alone, and doing all the things that I had accomplished for today, wore me out........ I called it a day.


    The next day I didn't start work until it had warmed up a little, about 10 o'clock. With the old fairing and fiberglass material removed, I could start building the transom pattern. Using the newly assembled Craftsman table saw, I ripped some 2'' strips out of the door skin to use as material to build the transom pattern with. I took the 2'' strips of door skin that I had ripped, measured and cut them to form the pieces of the pattern. Then, I hot glued all the pieces together forming a skeleton type frame around the outside edges of the transom. Then, I started to hot glue Popsicle sticks to the frame as Helmer had explained to get precise measurements. This process went very quickly and easily. In just a little while I had the transom pattern finished. On a earlier repair trip I had bought two sheets of 3/4" Marine Plywood, I had them stored in my boat storage unit (indoor). My boat storage unit was about 3 miles away, so I needed to go there and cut two oversized transom blanks from the 3/4'' plywood.


    I knew I was starting to run short on time, so I needed to keep working and try to hurry. I was starting to realize that I may not get the transom plywood "glassed-in" on this trip. Well, it is what it is.........."Que Sara, Sara" (what will be, will be). I grabbed "Sugar", a couple of saws, and an extension cord, threw 'em in my truck and headed to my boat storage unit. I thought it would be easier to cut some transom blanks out of the 4'x8' plywood sheets there, rather than wrestle the heavy 4'x8' sheets back to the cabin. There's no electricity in the boat storage unit. However, I have a 3000/6000 watt inverter and a 4 battery setup, wired in my truck. More than enough power to run the saws. I used the tailgate of my truck and two sawhorses to cut the plywood on. After cutting them, I loaded the two transom blanks in my truck and went back to the cabin. It was late afternoon, but I thought that I would have enough time to transfer the pattern onto the plywood and cut it. I set up two sawhorses and put the plywood blanks on them. I placed the transom pattern on the plywood blank, then I clamped the transom pattern to the plywood blank. I wanted to make sure nothing would move and that I would get an accurate "cut". I made a mark at the farthest point on each Popsicle stick, all the way around. Then I used a 18'' straight edge to connect all the marks together. When I was finished I had a "mirror image" of the transom drawn on the plywood blank. I decided to keep working after dark to complete the cutting of the plywood blank. The place I was staying had a porch light, and I used it to keep working. I used a jigsaw with a new blade, and I took my time to make sure I didn't make any mistakes. All in all, it took a little over an hour to cut the new transom. I was happy with the way it turned out. I was also tired and I called it a day. I could only work on the boat until noon tomorrow. Then I had to take the boat back to the storage unit, and start packing for the trip home. The weather was predicted to change tomorrow, to freezing rain and snow (great!) for the next two or three days.


    The next morning was overcast and windy. I waited until about ten o'clock for it to warm up enough to start work. I cleaned all the tools and materials out of the boat. I left the topcap in the supported, jacked up position and used ratchet straps to secure it in that position. I backed my pickup into position and hitched the boat to it. I had to load everything that was going to stay with the boat in the storage unit (tons of tools, materials, including the new table saw). After everything was loaded, I towed the boat and equipment to the storage unit. Once I was at the storage unit, I have to make myself go into "low gear" and take my time backing the boat into the storage unit. It's not that hard to do, but I'm still very careful and take my time. Once that was done, head back to the cabin and start packing. The next day is reserved for cleaning the cabin and loading and servicing my truck for the trip home (about 300 miles).


    The morning I left for home, it was spitting snow. I stopped in Tucumcari, NM on the way home to look at another Dorsett Catalina. The man that owns it has asked me a couple of times to come by and look at it, he wants to sell it. You can see it in my post in the Classic Boat Sighting section, title "19?? Dorsett Catalina". It looked a little "rough", but I'd like to buy the windshield from him......?? The rest of the trip home was uneventful, just long.


    Some observations and thoughts


    I am learning that work takes time, especially working alone. I used to think "I'll go out and jump on it, and I'll be done in no time". Well,..............it doesn't always work like that. I'm finding that "prep work" takes a lot of time before you can do the actual work. I need to figure that in before I set my expectations.


    I am thinking about uncapping the top half of the boat, and bringing home just the hull and continue the work here (transom, stringers, floor). I would get the work finished a lot sooner, at a lot less cost. Once the work is completed, I want to take the boat to Lake Powell in Arizona for a vacation. Hopefully in early October. I've already started getting ready for it, I just installed airbag suspension in my pickup to help carry the load of the boat and trailer.


    After reading Helmar's posts on his "16' Bell Boy Restoration". I think I need to turn my topcap upside down and replace the wood in the gunwale's, also. This is something I never would have thought of, thank you Helmar for your posts.


    I am looking into permanent under floor gas tanks or building seating that will conceal them. I am wanting at least 30 gal. storage, probably in two tanks. I need to get to the point where I can cut the floor out and see whats under it, see how much room there actually is.


    I am actively searching for a 85 - 90 hp Outboard motor, good running, with no issues. Ideally with controls, tilt trim, all cables. I'm also tossing around the idea of twin motors, 2 - 50 hp white Mercury's. I'm still researching the controls needed for twins. I'm thinking about the pros & cons of twin motors.


    Well, that's about it for this update. Check out the pictures I'm including................


    transom damage Removing stuck bolt in rubrail Crack in gunwale Stainless steel staples holding topcap and hull together Jacking up topcap Jacking up topcap Topcap raised at the transom Topcap raised at the transom Topcap raised at the transom (side view) Topcap raised at the transom (side view) Making the transom pattern transom pattern transom pattern Getting ready to cut the transom plywood Getting ready to cut the transom plywood

  • #2
    Wow. Quite an adventure.
    It makes it harder when you have to prep putting things up and down, I found that Any time I tried to quote a price to do something, I was working for less than minimum wage as Everything seems to take longer. In your case, I just can't see how you can meet any expectations on what needs to get done. Too many little hang ups like those top cap screws being alone.
    I have had to Hot Glue the wrench on a nut and some times even stick it into a pipe to hold the wrench so hot glue, duct tape and then when the head strips out, about all you can do is drill it. I have a special punch that is about the same angle as a drill bit offset and just have to keep pounding on the center of the screw top to at least attempt to get the drill bit to stay going straight. I will grab a credit card or something small at a right angle to make sure i am going into it straight but it tends to wander to one side or another.
    Some times if I can get a good bite on the bold side with the vice grips, rock it back and forth in hopes of just breaking the damn bolt or screw off.
    I also have several (I some times buy then 3 and 4 at a time, Dremel brand lasts the longest cutting screws) and been able to get a wedge between the two pieces of glass and jam that oscillating hack saw metal cutting blade up in and just cut them off.
    Times that I could not get it that way, I might have room to get the grinder up in the inside and grind the head off but you have to make sure you have a visual of it ever damn second or it causes more issues.
    So, with this, How in the hell can I quote someone a price on what the repair is going to cost. I think that is why I call them Guess-tah-ments .

    For my Bell Boy, It did not have any rub rail at all on it, I know what that stuff costs as it needs the aluminum rub rail with the rubber insert.. I needed a trailer for another customer so I found a Donor boat that had the rub rail on it that I needed, I got the trailer that I can clean up for him, got my rub rail, few extra parts and pieces and then just cut the top off, made it in smaller pieces to put in my little 4 x 6 x 4 tall trailer. Then advertised it on Craiglist as a Raised Bed Garden boat. Found a taker which saved me 85 bucks at the recycle center to rid of it..

    Not that I would ever think of it but the old saying, there is more than one way to skin a cat

    The thing about repairing fiberglass, if its structural, its Glass Resin to Glass, not Epoxy resin to Glass.. You can V that out with a dremel tool on the back side if you can see it, use some good old Gorilla Duct Tape on the outside (Never grab that stuff and just try to Jerk it or snatch it off, pull it off slowly or it will try to take some boat off with it) Then glass patch it on the one side by mixing up the fiberglass resin, pour a small amount after mixed into a smaller mixing cup and because I have never tried using the West systems cellica powder, I still empty my saw bags off my chops saws and table saw to get the wood dust. I will mix the wood dust into the fiberglass resin to make that a putty that I would fill the V up with (Learned that trick from George Calkins who was famous for such things as the Bartender boats). Then the other resin for some of the more heavy fiberglass tape to patch over the crack with. If I don't have the heavy tape, I use two strips of the not so heavy fiberglass cloth tape....Why am I calling it tape?? It does not stick to anything unless you use the resin....Anyway, its rolls of 1", 2", 3 and 4" fiberglass cloth that I can roll out for seams like on the edges between the hull and floor to create a seal.

    Back to digging out the old wood and filler on your transom.to get clean. I always go for 100% clean glass to glass too but its more than doable at 75% clean in spots.
    Now I can see you are getting a good understanding of the term Innovative Fabrication. I have had to modified tools for specific jobs even.

    (Need to got some food in me as my meds are trying to eat though the bottom of my stomach...There, got that out of the way)

    I didn't see were you changed the angle of your saw for the bottom cut on the new transom.
    Just remember, the trick is to not leave any air space for any condensation to start building up. If you don't have enough fiberfiller, make it up with some sawdust from your cuttings. If you have a old piece of screen door screen, sift it though that and use the fine's to make up a thicker resin putty to fill any voids you can.
    Being in the hot and cold, condensation can build up, then once that freezes it will start the rotting process. I know its kind of anal but I want anything I do to out last my grand kids.

    You are making progress but, Wow, the trips down, unpacking, packing back up it might be time to just take a long look at the progress you have made.

    Today, its me and Mr Grinder on my knees to clean up were my stingers were glassed down. Bunny suit and breather and maybe at least a hour. The whole insides of this boat is going to need sanded down. Some of the most durable paints won't hold up to Gellcoat but that is what I am thinking for the insides but never the less, I need to do a Lot of grinding. Off to it.

    Good progress so far on your repairs
    Helmar Joe Johanesen
    1959 Skagit 20ft Offshore, 1959 Skagit 16ft Skimaster,
    1961 17ft Dorsett Catalina.1958 Uniflite 17 ft
    Outboards: 2.5 Bearcats, 3 50hp White shadow Mercs
    2 40hp Johnsons, several smaller Old kickers for a total of 12

    Our Sister club
    http://www.goldenstateglassics.com

    Oh, and Where is Robin Hood when you need him??

    Comment


    • #3
      Helmar........., thank you for your reply

      In your reply,

      I found that Any time I tried to quote a price to do something, I was working for less than minimum wage as Everything seems to take longer.
      So, with this, How in the hell can I quote someone a price on what the repair is going to cost. I think that is why I call them Guess-tah-ments
      ​.

      Ha Ha ! ! ! .............How very true!!! I have a friend that does remodel work, piece work, or whatever you want to call it. He also tries to give estimates as best he can and still make money/profit. He once told me "by the time I finish this job, I'm probably going to owe him money" (lol). I was talking to a guy at Fiberlay about gelcoat color matching and about how much gelcoat it would take do re-do my hull. During our discussion he said that if he were to bid on gelcoating the hull, he would charge a $1000 a foot. He said not because of the cost of the gelcoat, but because of the amount of labor involved (sanding, sanding, and more sanding). (and polishing)

      I've read in your posts about changing the angle on your band saw, I wasn't sure why you did it. But, after reading your last post from your "16' Bell Boy Restore" page, and seeing your pictures of of the angle guides. I finally figured it out (no one's ever accused me of being smart). I was told by the tech's at Fiberlay to under cut the sides and bottom of the transom plywood by about 1/4''. Then fill the 1/4'' gap with a fillet of Fiberfil. If I remember correctly, it's to allow for expansion?? My plan was to cut some 1/4'' spacers for the plywood to rest on until the resin cured, then remove the spacers and apply fillets.

      I think I'm going to bring the hull home to complete the work sooner. I need to remove the cabin bulkhead to uncap it completely. Do you know where the screws are located that hold the cabin bulkhead in place? I also need to remove the steering wheel, I attempted to remove it once but couldn't get it off. I'll include a picture so you can see what it looks like. It's teleflex steering, I think??? It's the type with one large steering cable with a solid piece on the end of it, that attaches to the motor. Any idea what kind of puller I need? While I have everything apart, I going to refinish the cabin bulkhead and door. I'm not sure what wood finish to use. I'm thinking about using "Odies Oil Finish". I've never used it before. I watched a youtube video about it. You apply it with a rag or a brush, then buff it with an electric buffer. It buffs to a satin finish. In the video they were applying it on a 10' executive meeting table, the kind used in corporate meetings. It buffed out very nice looking. The reason I'm considering it is, if it gets dull from age just reapply and buff it. No sanding and refinishing each time. What types of wood finish do you normally use?

      I am open to all suggestions and will listen to anybody that wants to reply. Sharing your knowledge is a special gift.................


      Comment


      • #4
        New twin controls are still available. I get them off craigslist pretty scarce now. Please finish your transom first If your motor is good keep it. People liked those brown merks not so much on the white ones + expensive parts. If you rip your whole boat apart you wont be going to lake Powel this year. Summer isn't much fun without a boat. I've used zspar captains varnish it has to be sanded and recoated yearly.

        Comment


        • #5
          John,

          Thanks for the reply and advice. I'm still thinking about the pros and cons of twin motors, but I doubt if I go that route. To expensive. There is nothing wrong with the motor I have, runs good, no issues. It's a Mercury 115 hp (tower of power). It's just to powerful, I've had the boat up to 35 mph (GPS). At 35 mph the motor was only at half throttle, I feel sure the motor would push this boat to 50 mph, no problem. 50 mph in this boat is about 20 mph faster than I want to go. At 35 mph the boat handled fine, but I've heard that any faster these Dorsett Catalina's start getting squirrely. I've never been able to run this motor at full power (WOT). This motor is so strong that if you apply power, the torque will lean the boat to the left. You have to trim the motor upward to compensate for the torque, and stop the leaning. However, with this much power; the boat jumps on plane very easily.

          I've seen some beautiful results using spar varnish. I was just wondering about oil finishes for a boat, if anybody had any experience with it

          Comment


          • #6
            I don't hear you saying its too heavy or its physically too big. My boat develops those symptoms at 25. Most of the time I run it at 1/3 throttle. You are not a juvenile you don't have to keep inching up the throttle till you have a problem. I wish I could think of a motor that would be better for you for under 4k I'd get one too. I've found that the store bought teak oil is just very thin spar varnish. I'm experimenting with a brew of linseed oil kerosene spar varnish and tea tree oil. it might be ok for inside but the results outside are so far poor. Nothing better than getting a deal on fiber glass,remember you need to use 1.5 oz mat between layers.

            Comment


            • #7
              Hi John,
              Thanks for your reply,

              At this point, I don't have any problems with the motor being too heavy or its physically too big. Even after adding the weight of 3 - 6 gal fuel tanks in the rear, under the splashwell; the motor has the power to lift the boat on plane and trim it level. I added a "whaletail stabilizer" on the motor, and so far the boat has been fairly stable (up to 35 mph). I usually operate the boat at around 20 mph, with 25 mph being "high cruise". Although, I did operate it by inching up the throttle to 35 mph, at that point I decided that was as fast as I wanted to operate this boat. How else would you determine the capabilities of the boat? I'm not saying that it was safe or smart, but I wondered what the boat was capable of. I wish I could find a motor for under 4k too. A man contacted with a 75 hp Merc for $4375, who can afford that??? Most of the time I use the electric trolling motor. It's tied into the main steering and controlled with the steering wheel. I took the circuit board out of the trolling motor and made a control box for it under the steering console and control the speed from there (twist throttle). The boat has 2-100 watt solar panels and 4 house batteries, so plenty of power to run the electric motor all day. Usually I'm just fishing or sightseeing.

              What symptoms does your boat develop at 25 mph? Are you using any type of stabilizers?

              As for a wood finish??? I'm not sure what to use. If you get a chance, watch the youtube video's about Odies finish oil; it looks like a good product. I'm thinking about using it on the cabin bulkhead, it's inside and out of the weather. But, I'm always open to suggestions.

              Comment


              • #8
                First it starts to lean, then it leans and the stern kickes over to one side, then it leans,kickes and stars hopping and diving. On my first test it porpoised even at low speed so bad I didn't think I could fix it. I made a bow gas tank and trimmed the motor down a little. It came with a 40hp gale and under 20 mph it's a nice little boat.

                Comment


                • #9
                  John,

                  Here is a portion of an email I sent a couple of friends. It was sent right after I put the boat on the water for the first time. I was looking for answers to stop the leaning, and I wanted their advice. I had already installed the "whaletail stabilizer" and it was in use on the boat at the time of this email.


                  Performance Report:

                  This boat is greatly overpowered. It is rated by the builder for a 75 hp engine, it has a 115 hp engine. It is a Mercury 115 hp, they call it the "Tower of Power", and it truly is. Bob and I were at the boat storage one day, and there were a few guys loading their boat. One of them came over after seeing my boat and told us that the engine on my boat was way over powered for a boat that size, that he had had one like it. He was right.

                  Along with a bigger motor, comes a bigger propeller, which means, "more applied torque effect" from the propeller............with the motor trimmed all the way down, the propeller is directly under the centerline of the boat. In this position, the propeller has the most torque effect, causing the boat to lean to the left. As you trim the motor upward, the torque effect lessens because it changes the angle of attack of the propeller, in relation to the boat. With that being said, and remember this is a performance report, ie: at about 10-15 mph with the motor trimmed all the way down the boat leans to the left, if you trim the motor upward the lean goes away. So, any motor rpm change requires that the motor be trimmed to the "happy spot". When the motor is trimmed properly its a very stable ride.

                  This boat is 53 years old, and I don't push it very hard. Its not a race boat. This boat rises up on "plane" very easily, it will start to plane at about 10-12 mph. At 15-20 mph it feels like your really moving pretty fast, at 25 mph it is skimming on top of the waves very stable. The fastest I've taken it is 35mph, and I think that's to fast for the age of the boat and what its designed for. At 35 mph I didn't even have the throttle open 1/2 way, I feel like the motor will easily push this boat 50 mph. This boat doesn't like to make sharp turns above 22 mph, and you can tell it by the way it starts to handle. All in all, I like the boat, I just have to remind myself that its 53 yrs old, and its a cabin cruiser not a race boat.

                  It only draws about 8-10" of draft, so it very to pull to shore.

                  The main cabin and front cabin are waterproof and dry.

                  The electrical system worked without a flaw. With the freezer/frig, Tv (sometimes on all night because I fell asleep), lights, and trolling motor, and fans, the battery level never fell below 11.9 volts. The good part is that the system started recharging as soon as the sun came up.

                  The motor works fine and is dependable, although its a gas hog.
                  I asked the man I bought this boat from how the boat handled at wide open throttle, he replied "squirrely". But, he also told me that it porpoised pretty badly. I started researching "porpoising" and found out that a "whaletail stabilizer" would usually control or stop the porpoising effect. So I installed one.

                  I believe that a "whaletail stabilizer will solve your porpoising and give you much more stability. It will also bring your boat up on plane much quicker. I know this through my own personal experiences. Before I bought this boat I had a 17' V Tournament Bass Tracker. It came under powered from the factory with a 50 hp Mercury Outboard. It took forever for that boat to rise up on plane with only me on board. With two people on board, one person had to sit near the bow to get it to rise up to plane. And the boat struggled to do that. After installing a "whaletail stabilizer", the stabilizer would force the bow down and the boat would rise to plane easily. I could usually find a stabilizer on Craigslist pretty cheap.

                  As for fixing the lean, I'm not sure. I think that changing the propeller to one with less pitch might help??? Maybe a smaller diameter propeller with less pitch??? If I end up keeping this motor, these are the things I will probably try.

                  Comment


                  • #10
                    Does your 115 have power trim? If so the squirrel action can be minimized, often eliminated, with knowing how to properly use the trim switch as the boat moves from the hole shot all the way to final cruise speed. I'll elaborate more knowing if you have power trim and the switch on your controls.
                    Stabalizer "whale tails" are helpful to a degree if you don't have power trim but are often used by less experienced boat captains with little to no outboard operating knowledge.

                    It also sounds like you have a weight and balance issue. I wouldn't go so far as to add sandbags or some other non-essential item on board however re-examining your gear distribution when you're restoration is complete is a good start. All the gear doesn't need to go forward into the cabin but consider most of it fitting in there while under way.

                    These are some of the considerations you have to look at when you go with more horsepower. It's not impossible obviously but it will take a step back to rethink a few things.

                    When you start talking prop pitch and size, that's a whole other level. On my bass boat, I've swapped, even modified stainless steel props to get maximum efficiency from my 225hp Merc (read as Go Fast). You change pitch size, you change RPM range and top speed. There's a lot that can be covered on just props alone. Without hijacking this thread too much I'll just defer to Google for the rest of it.

                    Comment


                    • #11
                      The lean can be helped by moving the motor opposite the lean about 3/4 prop diameter,I have a seafair that came that way, or trim tab. The wale tail effectively makes the boat longer. I've had the boat about 20 years. It took me two years to replace the rotten plywood with urethane foam and fiberglass.I messed around with trim and trying to get the motor running halfway decent for another year. 25 mph is good enough. It runs at about 3000 rpm, The wake clears out with ease, I don't have to adjust anything. If I start at 5 am by noon when the wind picks up I've gone far enough.

                      Comment

                      Working...
                      X